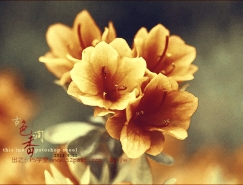
作者制作质感人像的方法非常实用,先降低肤色的亮度;然后增加肤色及及五官部分高光亮度和对比度;再给整体去色后再加上金属色;最后增加对比,增强局部质感,得到想要的效果。
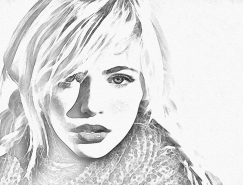
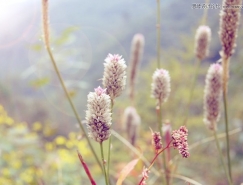
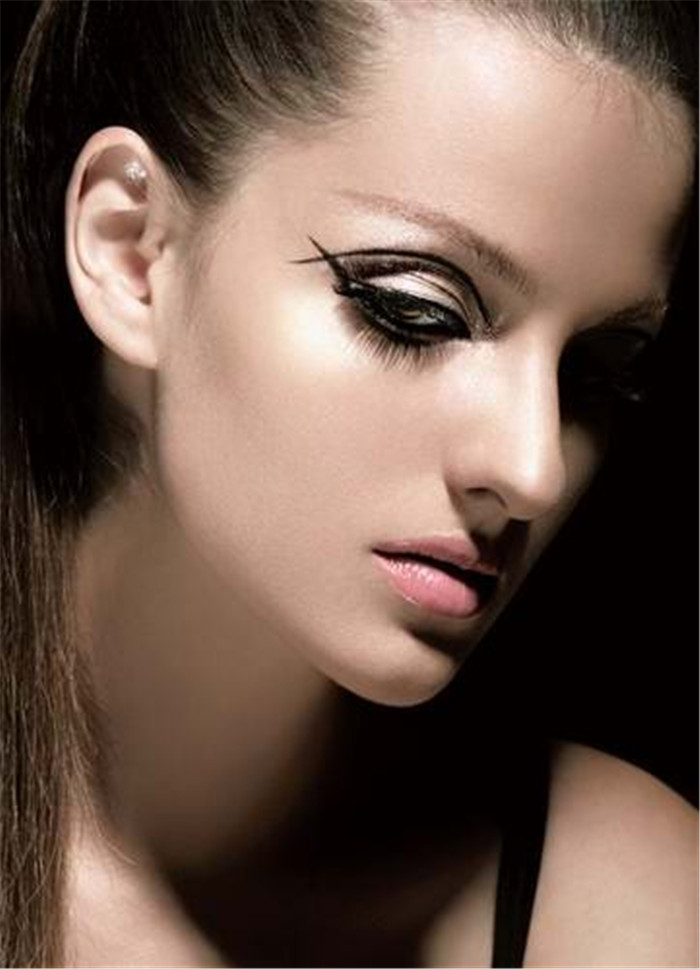
原图
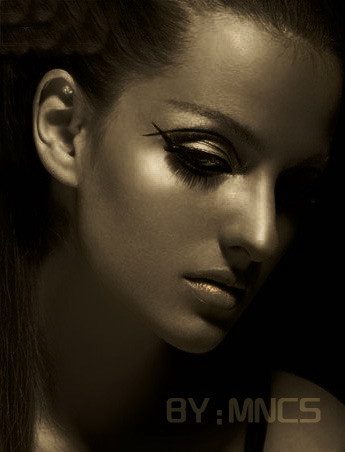
最终效果
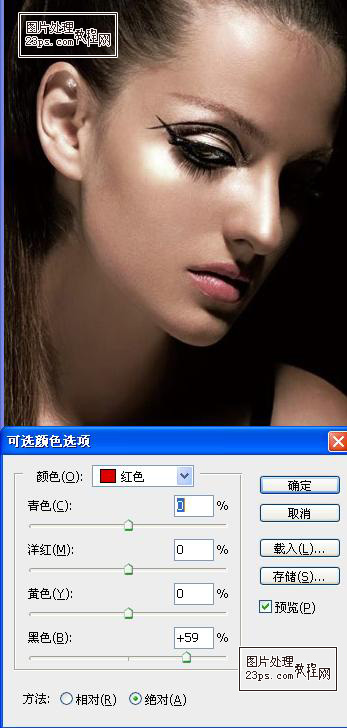
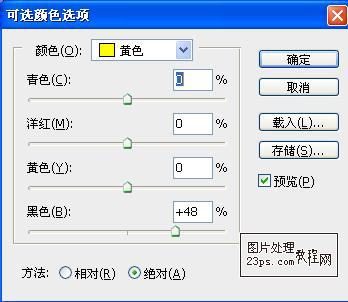
1、复制原图,新建可选颜色调解层,设置参数如下。
2、新建亮度/对比度调解层,调节亮度和对比度,然后降低柔角画笔不透明度到12%,在人物的五官和轮廓上进行涂抹。
3、新建通道混合器调节层,预设改为红外线的黑白,并调整参数,具体如下。
4、新建纯色调解层,拾取颜色#564931,确定后将图层模式改为颜色。
5、新建曲线调解层,调节曲线,具体如下。

6、建立纯色调解层,拾取颜色#544623,确定后黑色填充蒙板,在蒙板上用不透明度为12%柔角画笔擦出人物的轮廓和五官。

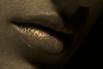
7、新建图层命名为唇,选择画笔,用#544623颜色,在唇部进行涂抹后将图层模式改为颜色减淡。

打上文字,将图层模式改为颜色减淡,完成。
原图

最终效果

1、复制原图,新建可选颜色调解层,设置参数如下。


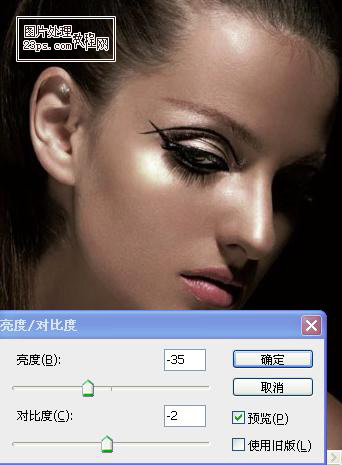
2、新建亮度/对比度调解层,调节亮度和对比度,然后降低柔角画笔不透明度到12%,在人物的五官和轮廓上进行涂抹。

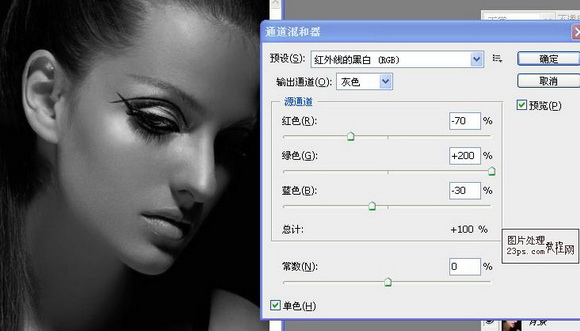
3、新建通道混合器调节层,预设改为红外线的黑白,并调整参数,具体如下。

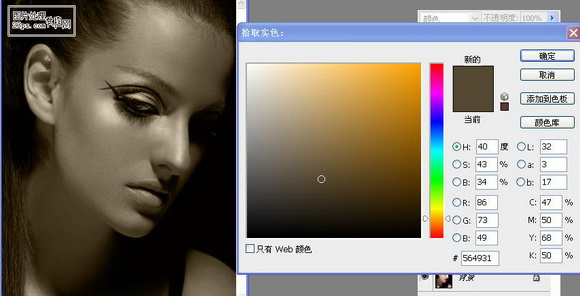
4、新建纯色调解层,拾取颜色#564931,确定后将图层模式改为颜色。

5、新建曲线调解层,调节曲线,具体如下。

6、建立纯色调解层,拾取颜色#544623,确定后黑色填充蒙板,在蒙板上用不透明度为12%柔角画笔擦出人物的轮廓和五官。

7、新建图层命名为唇,选择画笔,用#544623颜色,在唇部进行涂抹后将图层模式改为颜色减淡。


打上文字,将图层模式改为颜色减淡,完成。