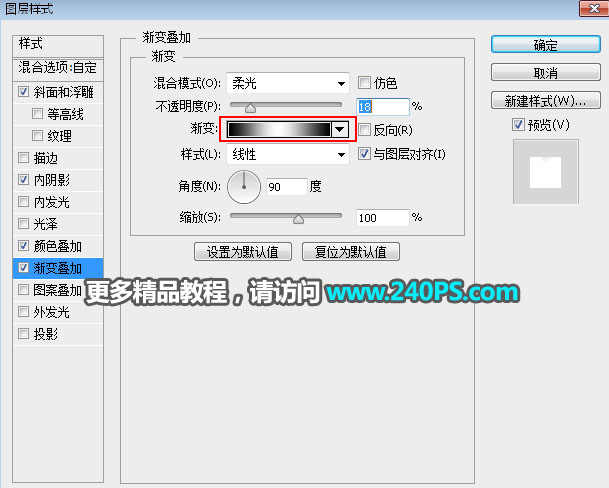
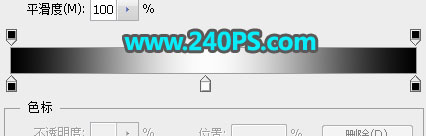
渐变叠加
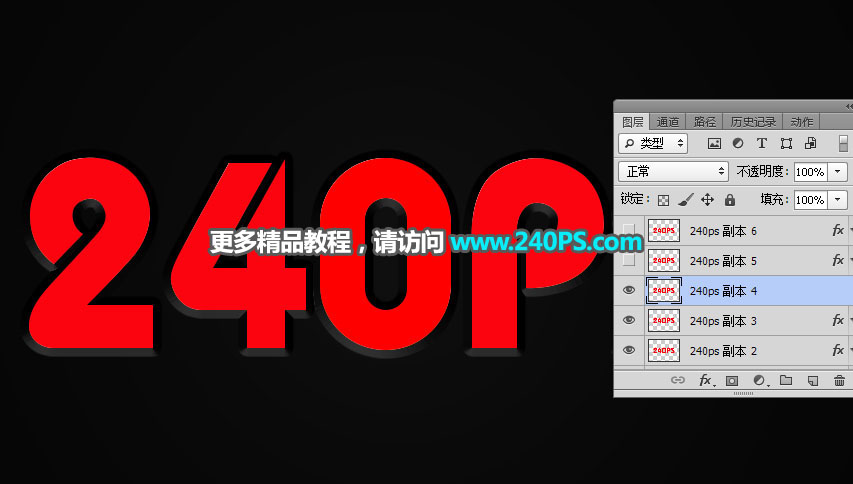
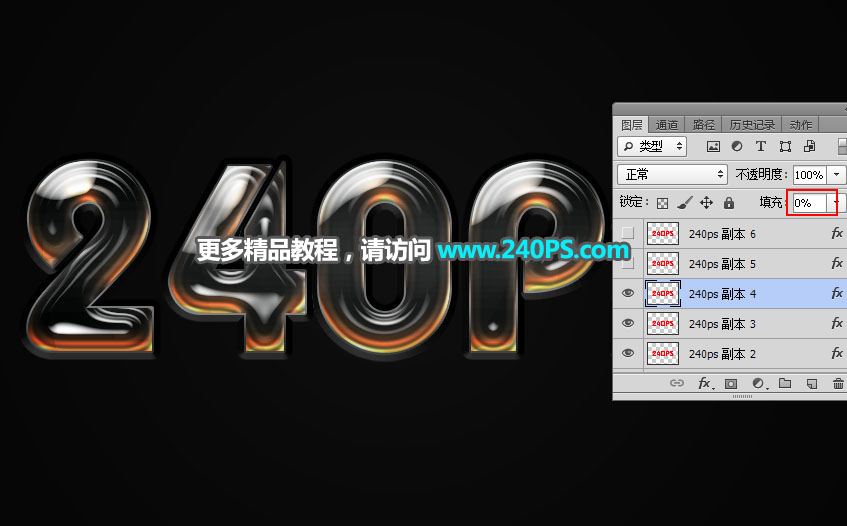
14、确定后把填充改为0%,效果如下图。

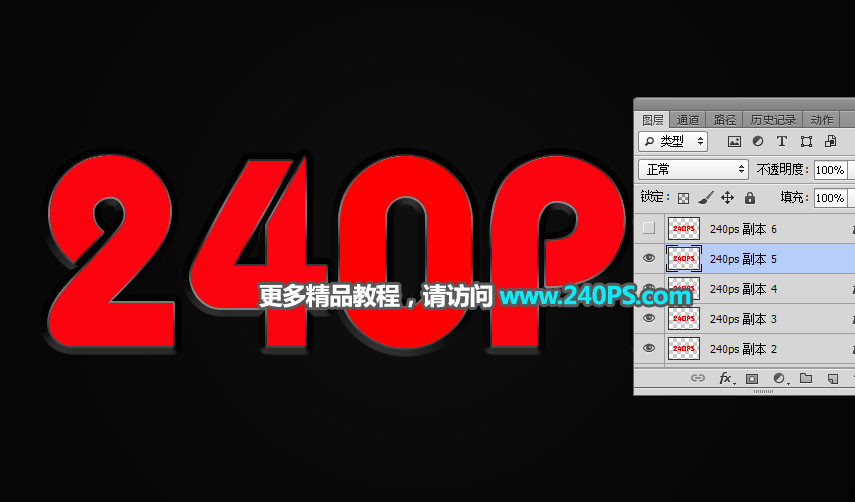
15、按Ctrl + J 把当前文字图层复制一层,然后清除图层样式,如下图。
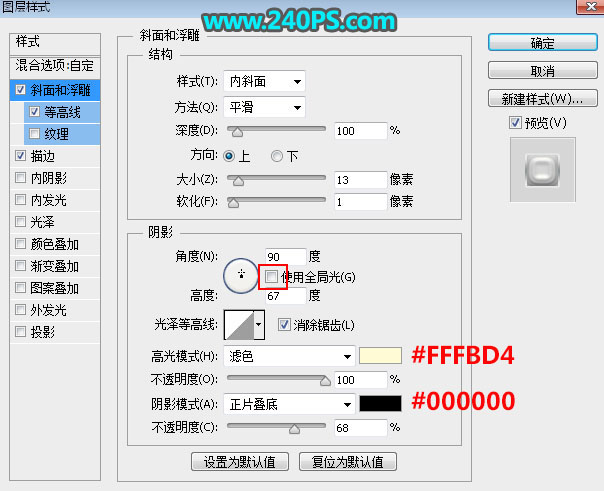
16、给当前文字图层设置图层样式。
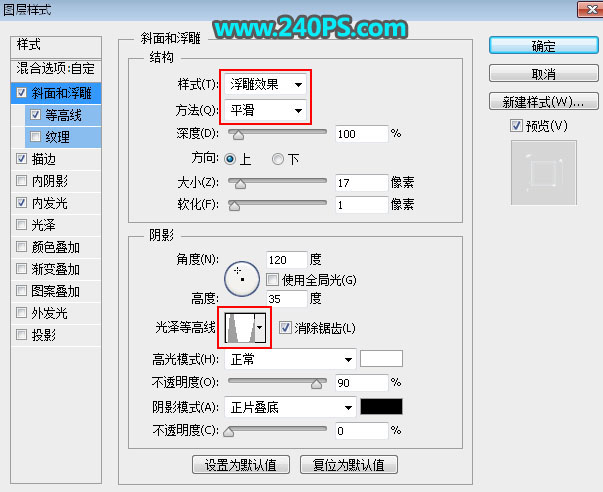
斜面和浮雕
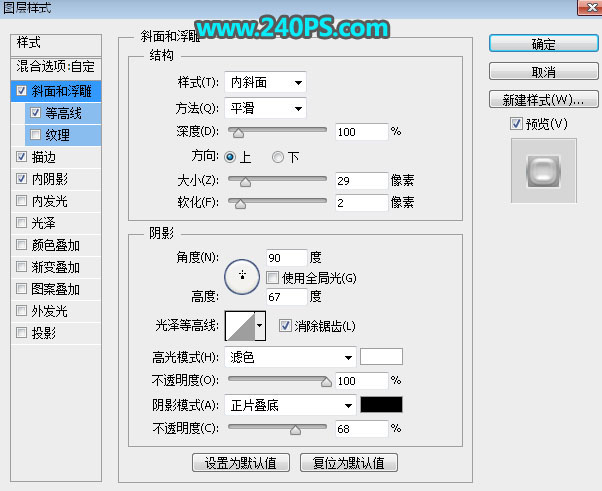
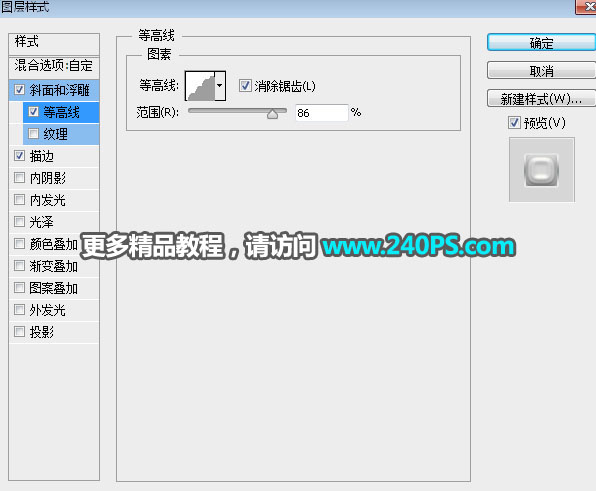
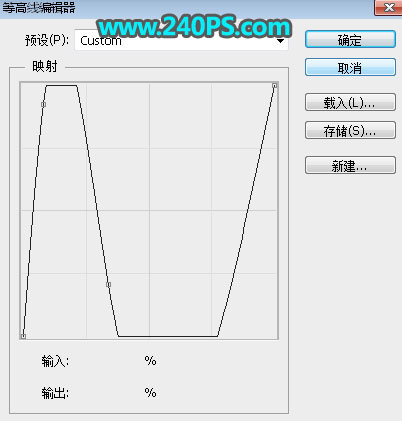
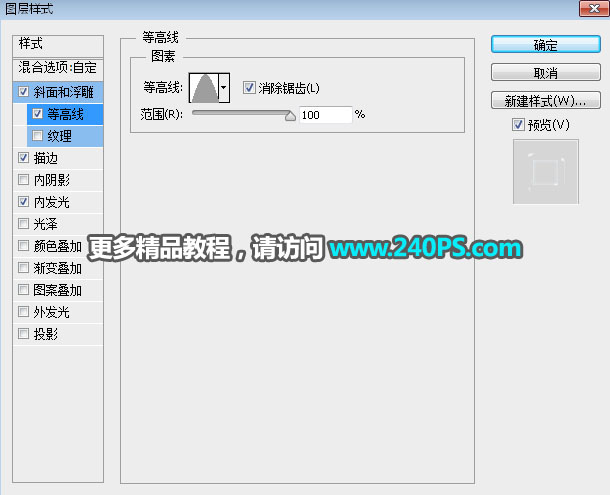
等高线
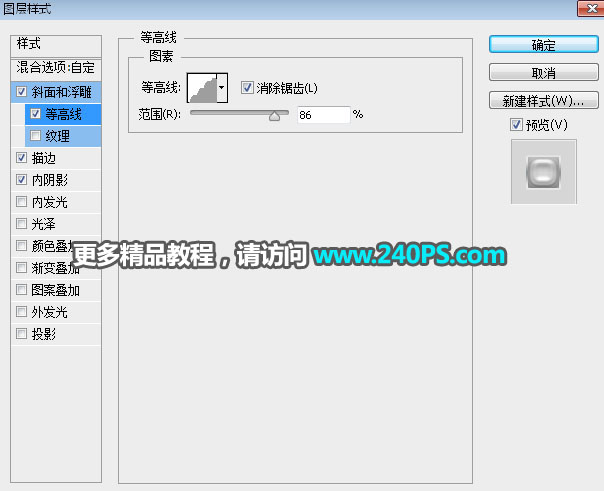
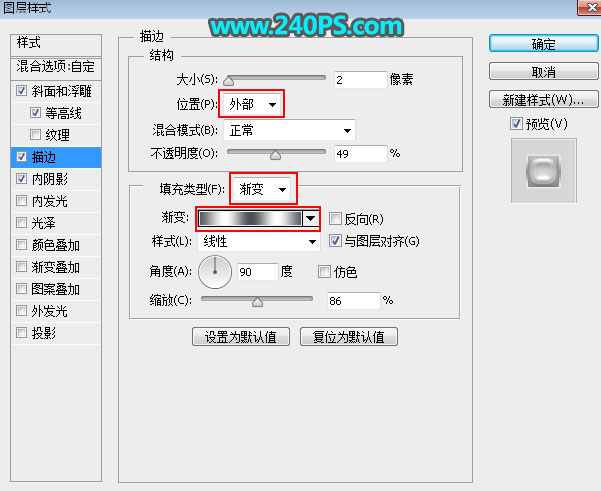
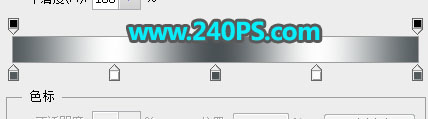
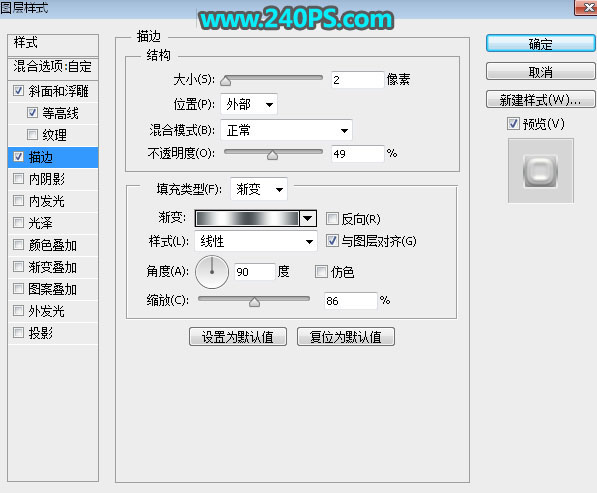
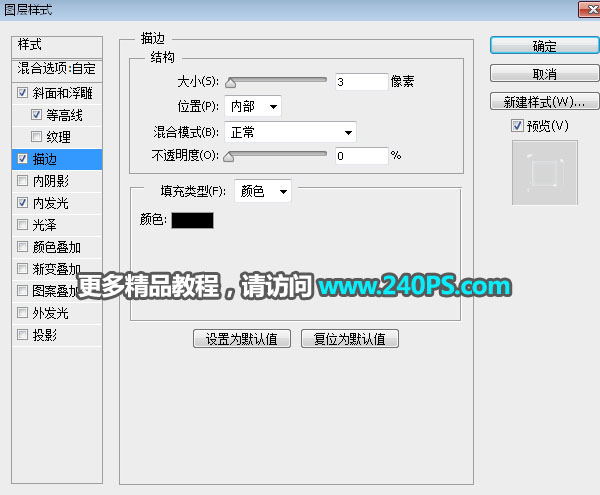
描边
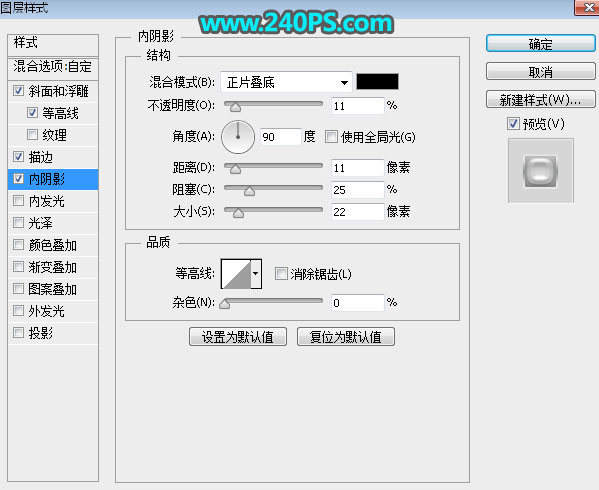
内阴影
17、确定后把填充改为0%,如下图。
18、把当前文字图层复制一层,然后清除图层样式,如下图。
19、设置图层样式。
斜面和浮雕
等高线
描边。确定后把填充改为0%。
20、复制当前图层,清除图层样式后再重新设置图层样式。

斜面和浮雕
等高线
描边
内发光

21、确定后把填充改为0%,如下图。
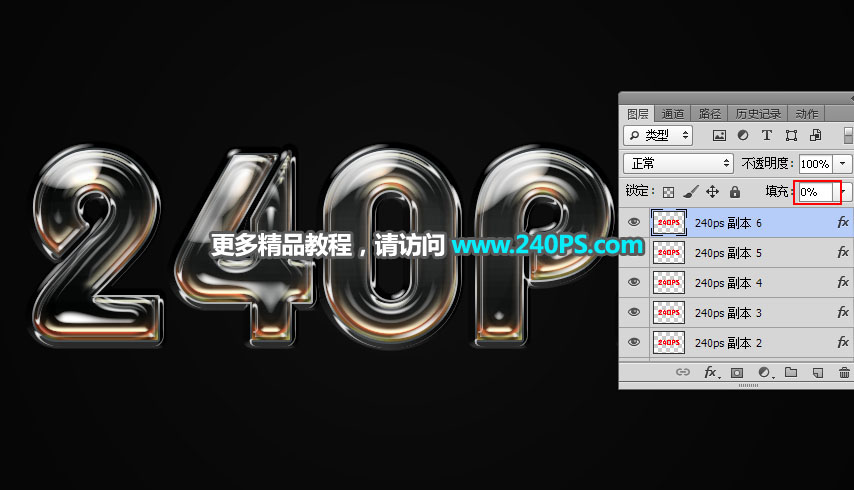
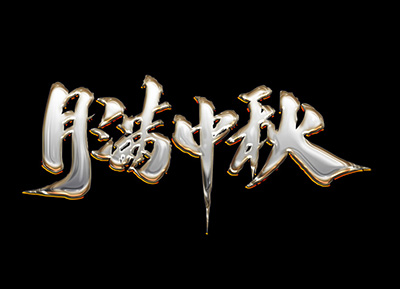
最终效果

标签:反光字